

| Attention Before you read this post, I highly recommend you check out my resources page for access to the tools and services I use to not only maintain my system but also fix all my computer errors, by clicking here! |
In this post I will be teaching you exactly how to fix DRIVER_POWER_STATE_FAILURE errors (which is a blue screen of death error also known by the Stop Error code 0x0000009f) in a Microsoft Windows environment.
What Is the DRIVER_POWER_STATE_FAILURE Error?
Blue screen of death (BSOD) errors or Stop errors (as they are sometimes called), are amongst the most severe Windows based errors that you can encounter while using your system. An individual will be confronted with a BSOD error, if a serious problem occurs on their system, which forces it to either restart or shut down in order to protect the systems integrity. You may see the following message in a lot of these errors:
“A problem has been detected and Windows has been shut down to prevent damage to your computer”
The DRIVER_POWER_STATE_FAILURE error occurs due to a number of different reasons, typically driver-related, for example, attempting to put your system into hibernation mode is known to cause this error.
Computer drivers are essentially instructions that are read by your computer system in order to use a particular hardware component, such as a keyboard, mouse, graphics card or sound card. Virtually, every hardware device within your computer has its own set of drivers that the system will call upon, when attempting to use that specific device.
What Causes This Error?
The most common causes for this error are as follows:
- Out of date driver software for installed hardware component.
- Out of date BIOS.
- Recent hardware or software change.
The DRIVER_STATE_POWER_FAILURE blue screen of death error will also occur when there is a change in power state, such as:
- Shutting the computer down.
- Putting the computer into sleep (hibernation) mode.
Hibernation related errors occur when the computer is getting ready to shut down, and instructs all hardware components to alter their power state, but due to the corruption, removal or incompatibility of a specific driver, one or more components incapable of responding to the Windows command, thus forcing the system to crash.
How to Fix It?
There are quite a few things that you can do to fix this problem, many of which are fairly easy to execute, however, there are some very difficult and dangerous techniques that I would only recommend as a last resort. As a result, I have listed each method in order of difficulty and risk to your system.
Install Latest Drivers
The DRIVER_POWER_STATE_FAILURE error is almost always due to a driver-related issue. If you have recently installed a new hardware device, such as a graphics card, printer or sound card, then you’ll want to make sure that you are using the most up-to-date drivers for them.
The code (in the error message) will usually make reference to the particular file that is causing the error. So your job should be to find out which drivers the file is attached to, and then reinstall those drivers.
However, there is a much easier method suited for beginners to intermediary users. That is, the use of driver updater, such as DriverFinder, a tool, which will automatically search the internet for all the latest drivers for all the devices in your computer, download them, and install them with very little hassle. A solution I highly recommended when it comes to updating your driver set. Anyway, you can download DriverFinder from the following link:
CLICK HERE TO CHECK OUT DRIVERFINDER
 The solution(s) below are for ADVANCED level computer users. If you are a beginner to intermediate computer user, I highly recommend you use the automated tool(s) above! The solution(s) below are for ADVANCED level computer users. If you are a beginner to intermediate computer user, I highly recommend you use the automated tool(s) above! |
Disconnect External Devices
Another method you may want to try, entails disconnecting all external devices from your computer, as it’s quite possible that one of them could be the main culprit for the DRIVER_POWER_STATE_FAILURE error.
If after disconnecting all external devices from your system, you no longer experience this error, then your next task will be to pinpoint exactly which device is causing the error, by reconnecting each device one by one. Once you’ve established which device it is, you should then contact the hardware manufacturer, as they should have suggestions on how to get their device to work with your computer.
Update Windows
Sometimes the installation of new software or hardware devices can cause problems. However, Microsoft are kind enough to be constantly pushing out new updates that tackles the various issues associated with these problem applications and devices.
With that said, ensuring that your computer is up-to-date with all the latest operating system updates is one method that you can use to fix this error.
To update Windows, simply do the following:
1. First, boot into your computer with full administrative rights.
2. Once in, press  + R, type wuauclt /detectnow /reportnow and click OK.
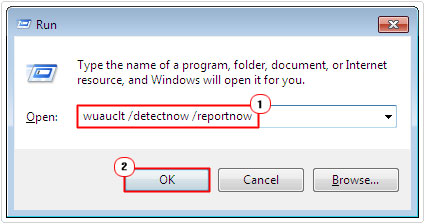
Note: This command will force the operating system to search Microsoft’s update server for any new updates. In the event that it does, it will notify you.
This is more of a precautionary measure as your operating system should already be configured to automatically update (and possibly) install the latest updates on your system.
Scan Files for Digital Signatures
Outdated drivers for hardware components, system services, such as antivirus tools and backup software, are all capable of causing the DRIVER_POWER_STATE_FAILURE error to occur. In order to verify that all appropriate files in your system have been digitally signed, simply do the following:
1. First, boot into your computer with administrative rights.
2. Then press + R, type sigverif and click on OK.
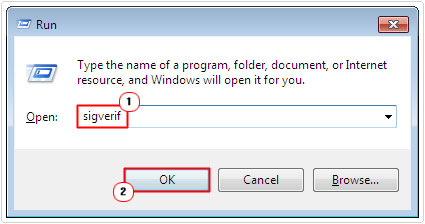
3. This will bring up File Signature Verification, simply click on Start.
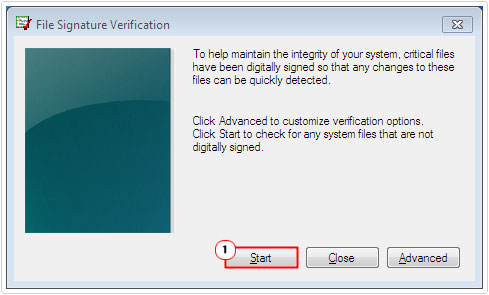
Note: Files and drivers that are found not be digitally signed should be uninstalled and replaced.
Use Driver Verifier
Driver Verifier is a tool designed to pin point exactly which driver is causing the error in your system. If the Driver Verifier finds an issue with any device driver, then it will present you with a blue screen of death error message.
For more information on how to use this tool, I suggest you check out my post on KMODE_EXCEPTION_NOT_HANDLED errors.
Run System File Checker
If the DRIVER_POWER_STATE_FAILURE error is due to the corruption of an important system file, then system file checker will find and replace that file, saving you having to reinstall Windows.
If you’ve tried all the above methods, but to no avail, then this tool is probably worth a shot; for help on how to run this tool, I suggest you check out my post on repairing Winsock errors.
Disable Advanced Power Management
Advanced Power Management (APM) is a feature available in your BIOS. In some cases, users have found that they were able to fix this error by switching this feature off.
To access this feature, you will need to enter you BIOS, which can be done by pressing either the Del or F1 key, when the computer immediately starts up.
Once you are in the BIOS, you will need to navigate through the various options until you come across the APM feature, simply disable it, then Save and Exit.
Specific instructions on how to complete this method, varies depending on the type and version of the BIOS in your motherboard.
Update Your BIOS
Another method that has proven to fix the DRIVER_POWER_STATE_FAILURE error, entails updating the BIOS inside your motherboard.
Updating your systems BIOS is a very critical process that will require some level of understanding on your own part. It’s also my recommendation that you only attempt this method if you feel it’s truly necessary.
Over the past couple of years, motherboard manufacturers have made it easier for the end users to update the BIOS, but despite that, it’s still a fairly difficult process, and one, if done incorrectly, could render your system inoperable. So if you opt to update your BIOS, the risks are something you should be cognizant of.
To update your BIOS, you will need to do the following:
1. First, go to the website of your motherboard brand.
2. Then locate the BIOS for your motherboard, by using your make and model numbers, ensuring that everything is 100% accurate.
3. Take some time to read through the documentation that comes with the BIOS update, for step by steps instructions on how to carry out this task.
4. Before you attempt to update your BIOS, make sure you have a stable power supply, as you will not want to lose power during the update process. Additionally, make sure your Laptop (in the event, that you are using one), is at least 50% charged.
5. Lastly, use the software or tool provided to update your motherboards BIOS.
Bad Hardware
If after attempting all of the methods above, you are still unable to fix the error, then there is a strong chance that you have bad or damaged hardware component inside your system.
I’d recommend you test your memory, to make sure it’s working correctly before anything else. You can do that, by using the appropriate testing software. Check out my post on the best stress testing tools, for more information.
If your memory modules pass the test, then you next step will be to work your way down to the other components, using the process of elimination.
Are you looking for a way to repair all the errors on your computer?

If the answer is Yes, then I highly recommend you check out Advanced System Repair Pro.
Which is the leading registry cleaner program online that is able to cure your system from a number of different ailments such as Windows Installer Errors, Runtime Errors, Malicious Software, Spyware, System Freezing, Active Malware, Blue Screen of Death Errors, Rundll Errors, Slow Erratic Computer Performance, ActiveX Errors and much more. Click here to check it out NOW!