

| Attention Before you read this post, I highly recommend you check out my resources page for access to the tools and services I use to not only maintain my system but also fix all my computer errors, by clicking here! |
In this tutorial, I intend to discuss how you can fix error code 0x80070057 on your system. However, before I divulge into it, I want to discuss a number of things that should put you in the right frame of mind, when it comes to tackling this error.
So What Is It?
The error 0x80070057 most commonly occurs on Windows 7 based systems, though not limited exclusively to it.
Most individuals report receiving the error code 0x80070057 while attempting to install Windows 7 onto their computers for the first time; the exact error message varies, but some report receiving the following:
Error 0x80070057: The parameter is wrong.
Computer users may also receive this particular error message while attempting to move a document or file. So it’s a fairly expansive error that encompasses a number of causes and symptoms.
What Causes Error Code 0x80070057?
While attempting to install Windows 7 on your computer for the very first time, you could receive the following error message:
An Internal error has occurred. Incorrect parameters
If you see this specific error message, then you can be certain that you are dealing with error code 0x80070057. In this particular instance, this error occurs when attempting to make a full backup of your Windows 7 operating system.
- The main culprit for the error is registry size limitations.
Registry size limitations are usually the result of an individual attempting to backup their operating system without the required hard disc space. The sure-fire way of rectifying this issue is to increase the size of your virtual memory space.
- The error code 0x80070057 can also occur due to incompatibility issues between the motherboard and component drivers.
As a computer user, you would naturally be required to ensure that all installed drivers are compatible with your motherboard. If you are unable to do this manually, then there are automated solutions that you can adopt.
- Another cause is said to be due to a failed or rather improper RAID installation.
RAID installations are notorious for creating this error. If you are experiencing this error, on a system with RAID, then you may want to consider turning it off, and observing whether or not it has solved the error.
- A faulty or corrupt Windows registry is also known to cause this error.
Thus, it’s important that you have the necessary optimisation software on your computer; this will ensure your computer always has a clean bill of health.
How to Fix It?
The error code 0x80070057 is definitely fixable. Therefore, there is little cause for alarm, as there are many techniques you can deploy to effectively combat it. With that said, below are some of the more common remedies, though, based on the circumstances you received the error message in, only some of the methods below will be applicable to you.
Run Registry Scan
This is the first method one should use to fix this error, which entails downloading and installing a registry cleaner tool. These tools will clean up memory space while increasing the virtual memory space available to your system.
There are many tools around that are capable of doing this for you, but I personally recommend Advanced System Repair Pro, and that’s because it’s much more than a registry cleaner, but an entire maintenance and optimisation suite. You can pick this tool up here:
CLICK HERE TO CHECK OUT ADVANCED SYSTEM REPAIR PRO
 The solution(s) below are for ADVANCED level computer users. If you are a beginner to intermediate computer user, I highly recommend you use the automated tool(s) above! The solution(s) below are for ADVANCED level computer users. If you are a beginner to intermediate computer user, I highly recommend you use the automated tool(s) above! |
Increase Virtual Memory
If you receive the error message every time you attempt to back up your operating system or some other related activity, then this is likely the fix for you. In a lot of cases, increasing the virtual memory size is enough to eliminate the error, especially in Windows 7 based system. With that said, you don’t have to be an advanced user to do this, as it’s fairly simple. Just follow the instructions below:
1. First, boot into your computer with administrative rights.
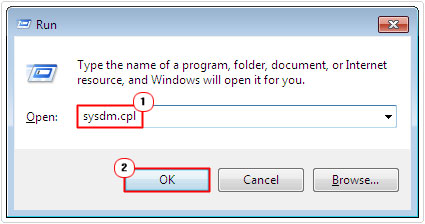
2. From here, press  + R, type sysdm.cpl and click on OK.
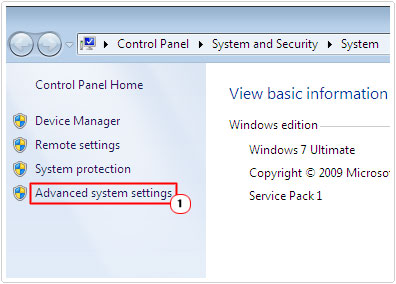
3. On Windows Vista/7, click on Advanced System Settings.
4. This should bring up System Properties, from here click on the Advanced Tab, and then click on Settings under Performance.

5. This will bring up a Performance Options applet, from here, click on the Advanced Tab, and then click on Change under Virtual Memory.
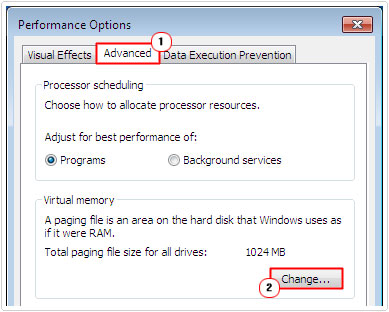
6. Un-tick the box next to Automatically manage page file size for all drives, then on Custom size, lastly, set the Maximum Size (MB) to 1.5 X Physical RAM, and the Initial Size to 1 X Physical RAM, then click on Set and OK.

Note: Once you’ve made changes to your virtual memory size, you will need to reboot your computer.
Manually Tweak Your Registry
As previously mentioned, there is a good chance your computers registry is corrupted; thus, using an automated registry cleaner is the recommended option. However, in the event that such option does not appeal to you, you can always make the necessary changes to your registry manually.
WARNING: Manually editing your registry is very dangerous and if done incorrectly can render your system inoperable.
1. First, boot into your computer with administrative rights.
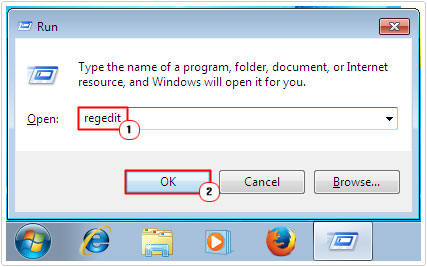
2. Once in, press + R, type regedit and click on OK.
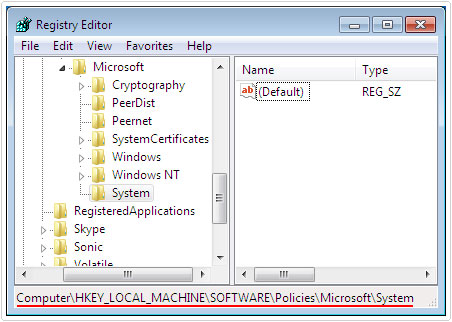
3. From the Registry Editor, navigate to the following path:
HKEY_LOCAL_MACHINE\SOFTWARE\Policies\Microsoft\System
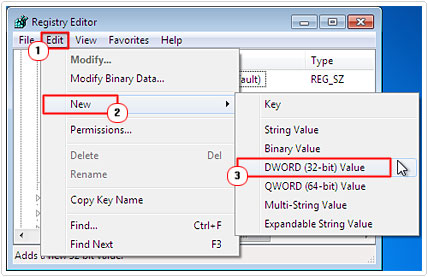
4. Then click on Edit -> New -> DWORD.
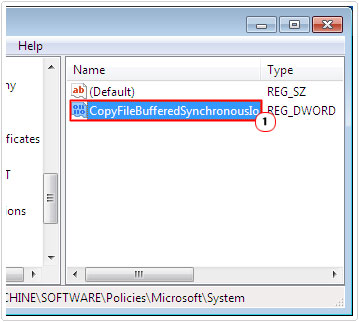
5. Then name it CopyFileBufferedSynchronousIo and Press Enter.
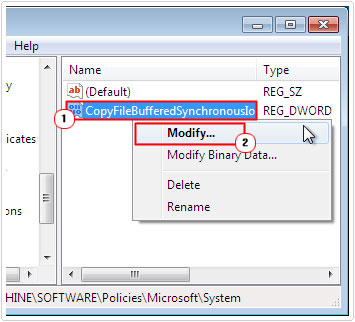
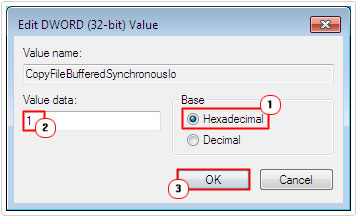
6. Once you’ve done that, right click on CopyFileBufferedSynchronousIo and select Modify.
7. Make sure Base is set to Hexadecimal, then in the Value data box, type 1 then click on OK.
8. Then close the Registry Editor.
Chance Decimal Symbol Settings
Another quick method that has been known to fix this error entails changing the decimal symbol settings for Windows. This is a fairly simple process, which can be done by doing the following:
1. First, ensure you’ve booted into your computer with administrative rights.
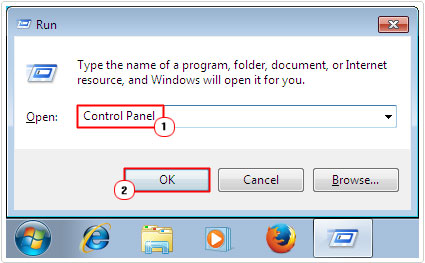
2. Then press + R, type Control Panel and click on OK.
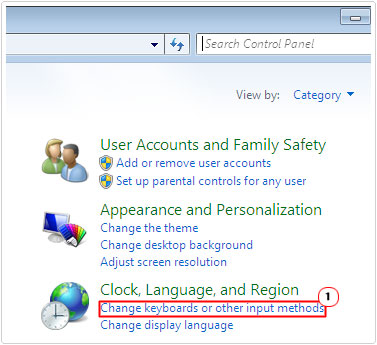
3. From Control Panel, double click on Regional and Language Options [Windows Vista/7: click on Change keyboards or other input methods under Clock, Language and Region].
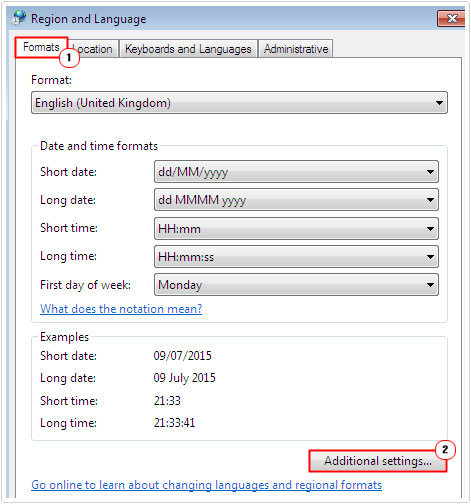
4. From the Regional Options Tab, click on Customize [Windows Vista/7: Click on Formats Tab, then click on Additional Settings].
5. In the Decimal symbol box, type . and click on OK.
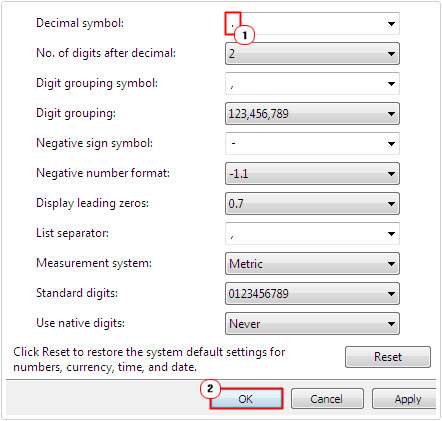
6. Lastly restart your computer.
Shrink Partitions
Another common situation that individuals encounter this error code 0x80070057 in is when they attempt to install a new copy of Windows 7 on their computers. The reason why they may encounter this error is due to the partition they attempt to install the OS on, being too small. Thus, as a viable solution, users should consider shrinking all partitions on their drive so that they can use the maximum capacity of their hard drive.
To do this, simply do the following:
1. First, ensure you’ve booted into your computer with administrative rights.
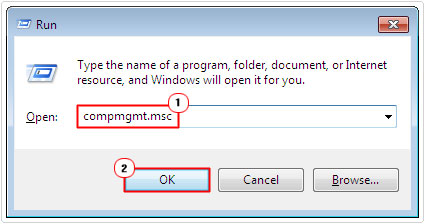
2. Then press + R, type compmgmt.msc and click on OK.
3. A Computer Management applet will appear, from here, click on Disk Management, lastly right click on any small partitions and select Shrink Volume.
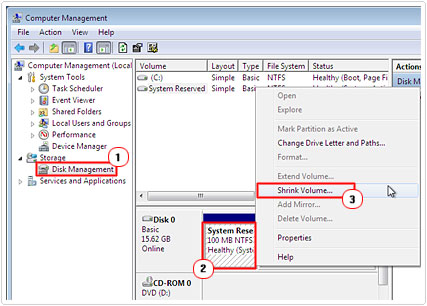
Note: Shrinking your partitions, will increase the maximum capacity of your primary hard drive letter.
Purchase New Hard Drive
If after attempting to shrink all your hard drive partitions, you are still unable to install Windows 7. Then you should consider buying a new hard drive, as the problem could be physical. If you can, try running a diagnostic scan on your hard drive. In order to do that, you may need to install the hard drive inside of a working computer and run the necessary tests.
Note: All hard drive brands have their own diagnostic tools that you can download and run.
Are you looking for a way to repair all the errors on your computer?

If the answer is Yes, then I highly recommend you check out Advanced System Repair Pro.
Which is the leading registry cleaner program online that is able to cure your system from a number of different ailments such as Windows Installer Errors, Runtime Errors, Malicious Software, Spyware, System Freezing, Active Malware, Blue Screen of Death Errors, Rundll Errors, Slow Erratic Computer Performance, ActiveX Errors and much more. Click here to check it out NOW!