

| Attention Before you read this post, I highly recommend you check out my resources page for access to the tools and services I use to not only maintain my system but also fix all my computer errors, by clicking here! |
If you’re reading this post, I think it’s safe for me to assume that you have monitored a lot of hard disk activity on your computer and was wondering what MRT.exe is? Fortunately for you, you have come to the right place, as I intend to explain in-depth exactly what this process is, how to use it and how to rectify any issues you may be having with it.
What Is MRT.exe?
If you’re the kind of person that likes to keep tabs on what Automatic Updates is installing on your computer, then you probably noticed the critical update named Windows Malicious Software Removal Tool with KB890830 label. To put it simply, it’s a free antimalware tool, capable of detecting and removing viruses, Trojans and worms on Windows XP, 2000, Server 2003, Server 2012, Vista, 7, 8, 8.1 and 10 based systems.
The Malicious Software Removal Tool is rather basic, though it is free, and is installed automatically on Windows based systems that have Automatic Updates enabled. This makes this particular tool a very functional solution to detecting and removing malicious files on your computer, especially for those individuals that do not have a full internet security solution on their computers or at least one that is regularly updated. This tool can also prove to be a last resort, in the event that your current solution was unable to detect any viruses, worms, root kits, Trojan horses and malware files lingering on your computer system.
But how do you go about using this tool? Unlike your typical Windows application, this particular tool does not have a shortcut in your Start Menu nor a Desktop or Quick Launch icon. Actually, this tool is configured to run automatically in the background of your system at least once per month, without your knowledge. However, if you would like to run this tool to check your computer system manually, of any suspecting malicious files, it is possible for you to do that. Continue reading, for step by step instructions on how to effectively do it.
The MRT.exe file can be found in the following location on your computer:
C:\Windows\System32
In the event that you find this file located elsewhere on your computer, it’s safe to assume that your system may have been compromised.
Locating the Log Files of Saved Scan Results
With each scan completed by this tool, a log file is created. In order for you to find out whether it successfully or unsuccessfully located and removed any malicious files from your computer, you will need to verify the scan results. It’s also possible for you to find additional information on possible culprits of a high CPU load issue.
You can find the log files for the scan results in the following location:
C:\%windir\debug\
The file you should check will be titled mrt.log. Within that log file, if you see any return codes other than “0”, then it means you have or had a malicious file on your computer, which the program should have removed.
Do You Need MRT.exe?
If you already have an internet security suite running on your computer, then you probably do not need MRT.exe. Typically, in such a situation the MRT.exe tool will automatically take a back seat to your current solution. However, if you would like to make certain it does not run itself, you would need to completely disable the Windows Security Center, which I personally do not recommend.
Can You Remove MRT.exe?
MRT.exe is a non-system process, which means it is possible for you to safely remove it from your computer. However, I personally do not recommend that you do that, especially if you want to keep your system secure. You should only ever consider removing this tool in the event that you experience problems with it. That said, if you are adamant about removing it, I recommend you consider backing the file (MRT.exe) up, alternatively, you can run System File Checker, in the event that you would like to restore the file.
Why Is MRT.exe Causing High CPU Load?
The most common reason why the MRT.exe file running in the background of your computer is using up so much CPU resources is because it is scanning for malicious files, at that particular time. For a clearer understanding of what it is doing, you should consort the log file(s).
However, as an alternative to having this program constantly running, at 30 day intervals, you may want to consider downloading and installing your own internet security solution. For the purpose of securing ones computer system, I would personally recommend SpyHunter, and that’s because of its efficiency, ability to locate, detect and remove malicious files and also its ability to repair previously damaged Windows components. Anyway, you can download this powerful tool from here:
CLICK HERE TO CHECK OUT SPYHUNTER
Using MRT.exe
MRT.exe the Windows Malicious Software Removal Tool can be run by doing the following:
1. First, you will need to boot into your computer with a user profile that has full administrative rights.
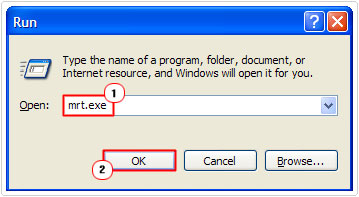
2. Then press  + R, type mrt.exe and click on OK.
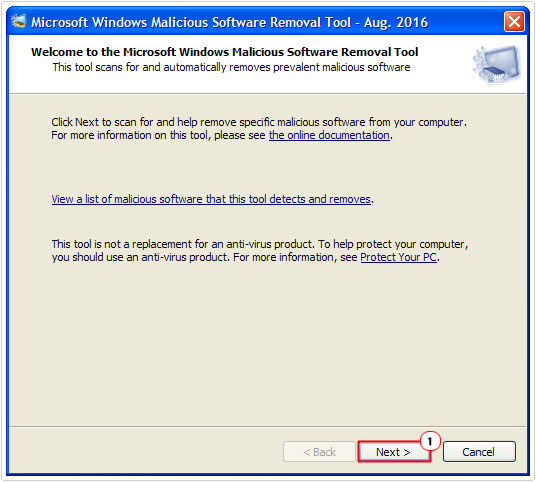
3. This will load up the Microsoft Windows Malicious Software Removal Tool, in the title bar it should indicate the version, depending on the current date it should be fairly recent. From here, click on Next.
4. This will take you to the Scan type option menu, select Full Scan, and then click on Next.
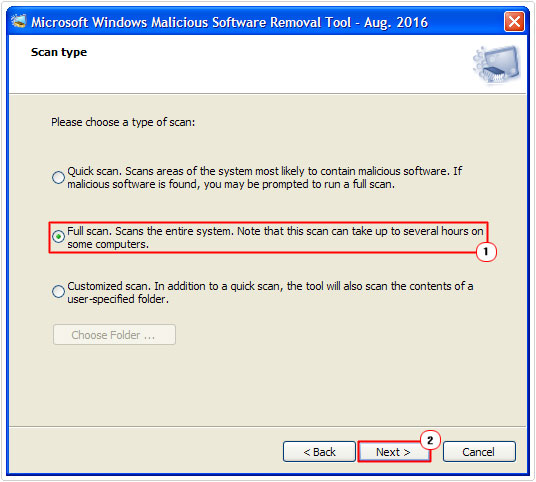
Note: By default, the Quick scan option will be selected; this option will scan the most vulnerable areas of the system including the computer memory for malicious files. It will also detect whether or not your browser has been hijacked, while deleting invalid and corrupted registry keys associated with the malicious files. If the software finds malware, in some cases it may prompt you to perform a full extended scan or you may choose to run the recommended full scan yourself.
The Full scan will scan every folder and file on your computer.
The Custom scan option will allow you to choose the specific folders that you would like the program to scan.
5. This will take you to the Scanning your computer screen, where you will be required to wait for it to complete the process.
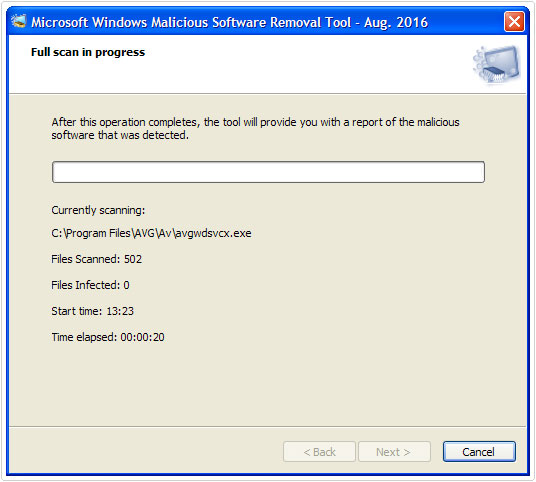
Note: If the program finds any malware on your computer, it will prompt you to remove it. It will give you the option to choose whether to clean specific infected files or all of them. During this process, it is possible that you may lose data due to file corruption.
6. The next screen it will take you to will show details of the scan results. Click on View detailed results of the scan, in order to see a synopsis of the various malware the tool scanned for, and its results.
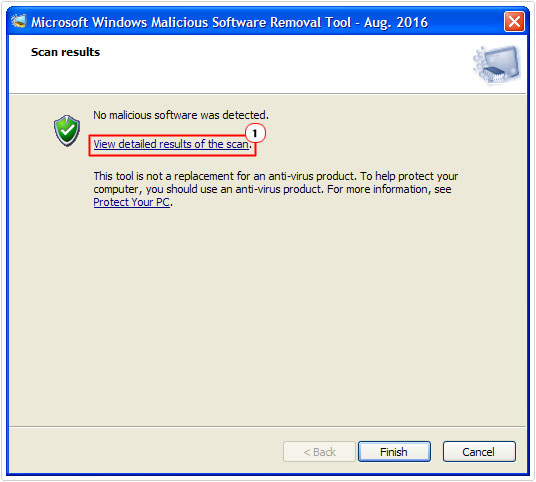
Note: If the program successfully removes a malicious file from your computer, you should see something like “infection was found and successfully removed” or in the event that it was unable to remove it, it may say “infection was found but was unable to remove”. In some other instances it may say “the infection was found and was partially removed, computer restart is required”.
An mrt.log file will also be created, in the previously specified location, containing all of this information.
Can I Disable Anonymous Reports?
This tool sends anonymous reports to Microsoft of every completed scan, a process that you may want to disable. However, because the process is anonymous, it does not pose any real security-risk to your computer and may even go a long way in helping Microsoft improve their security software.
Sadly, computer hackers are constantly creating more and more viruses, which when created are unrecognisable to most security tools. As a result, security tool developers rely on anonymous reports in order to find new malicious files. With anonymous reports enabled, you are actively helping to secure not just your computer but others using the same software.
That said, if you would like to disable this feature, you can do so, by doing the following:
1. First, boot into your computer with administrative rights.
2. Then right click on your Desktop and select New -> Text Document.
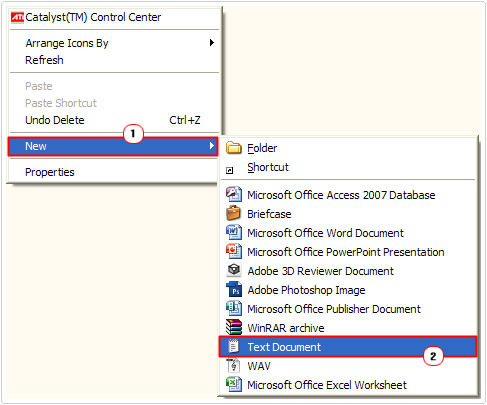
3. This will create a New Text Document on your Desktop, double click on it, to open it and copy and paste the following into it:
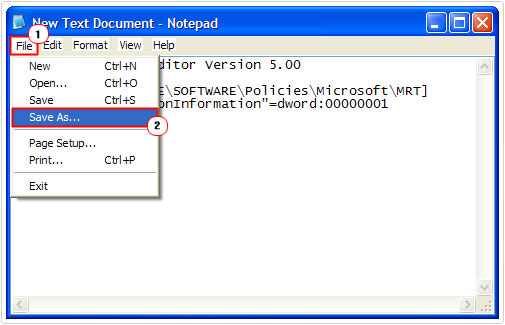
Windows Registry Editor Version 5.00

[HKEY_LOCAL_MACHINE\SOFTWARE\Policies\Microsoft\MRT]
“DontReportInfectionInformation”=dword:00000001
4. Then click on File -> Save As.
5. When the Save As dialog box pops up, type Anon.reg into the File name (make sure Save as type is set to All files), then click on Save.
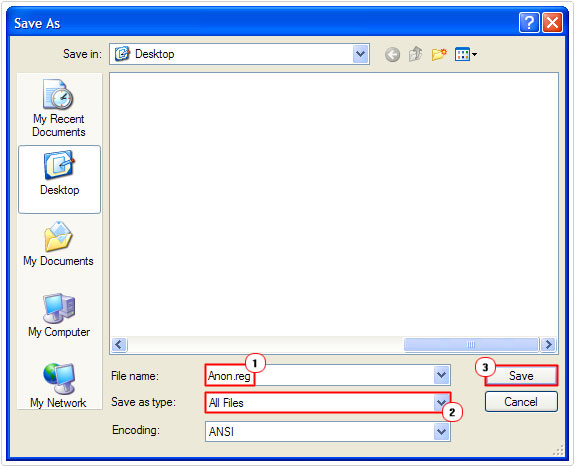
6. Lastly, double click on the Anon.reg to disable anonymous reports.
Are you looking for a way to repair all the errors on your computer?

If the answer is Yes, then I highly recommend you check out Advanced System Repair Pro.
Which is the leading registry cleaner program online that is able to cure your system from a number of different ailments such as Windows Installer Errors, Runtime Errors, Malicious Software, Spyware, System Freezing, Active Malware, Blue Screen of Death Errors, Rundll Errors, Slow Erratic Computer Performance, ActiveX Errors and much more. Click here to check it out NOW!