
| Attention Before you read this post, I highly recommend you check out my resources page for access to the tools and services I use to not only maintain my system but also fix all my computer errors, by clicking here! |
It’s not uncommon for end users to encounter NVIDIA High Definition audio no sound problems while using the HDMI interface to stream video or audio through another screen. If that’s you, then you need not worry. In this tutorial, we will be going through a number of steps, all of which have proven effective at fixing this problem.
There are literally thousands of people that have encountered problems with the NVIDIA High Definition Audio feature of their GPU. But this is to be expected, given the sheer number of NVIDIA GPU owners. The exact cause of this problem varies, quite considerably.
NVIDIA High Definition Audio is basically a driver that integrates sound into the GPU device, providing the highest quality of sound.
The exact specifications of this audio “codec” is as follows:
Sample Rates: 32 kHz – 192 kHz
Bit Depths 16-bit – 24-bit (with limited support for 20-bit)
Audio Channels: Stereo (2.0) – 7.1 Surround Sound configurations
The NVIDIA High Definition Audio “codec” is supported by GeForce 600, 10, 20, 30 & 40 series GPUs. Cards within this range fully support the codec via HDMI. However, older GPUs, such as GTX 465, 470, 480, 570, 580 & 590 do not support this feature, due to obvious hardware limitations (no audio pass-through support).
The issue occurs most often when a Windows user attempts to transmit video and audio over a second display. However, it can also occur as the result of newly installed drivers or an update. To follow, will be a breakdown of the most common causes of this problem. After which, we will discuss verifiable solutions you can adopt right now.
What Causes NVIDIA High Definition Audio No Sound Issues?
There are a wide variety of reasons why you may be faced with issues pertaining to the NVIDIA High Definition audio feature. However, the most common causes are outlined below:
- Newly updated drivers were improperly installed: This is a fairly common issue. Improperly installed drivers triggering problems. The partially failed install could have been due to an interruption during the installation phase.
- Audio output Device has been changed: When you make changes or update things in Windows, it can, in some instances lead to changes in certain setting options. In this case, the wrong audio output device may be selected.
- On-board audio has been disabled via the BIOS: If you have an integrated GPU (Audio) solution, then it’s possible that sound has been disabled in the BIOS settings.
- Faulty GPU: You can never rule out actual physical damaged to the device itself. In this case, the HDMI port may have been damaged – which is a very common issue.
Now that you have a general understanding of what may be causing this NVIDIA High Definition audio no sound issue, let’s go through a number of solutions that you can adopt right now.
How to Fix It
I guess, the best thing about this issue is that it is totally fixable, and requires very limited technical knowledge to do so. To follow will be a number of solutions, listed in order of difficulty and effectiveness.
Thus, it’s recommended that you attempt the solutions in the order that they appear.
Confirm Audio Output Device
Since it’s not uncommon for a device to have more than one audio driver installed on your system, it’s possible that the wrong one has been selected. As previously noted, driver issues may also be to blame for this exact problem.
To determine whether or not the right audio driver has been selected, follow the steps outlined below:
1. Boot into Windows as a full administrator.
2. Next, press  + I, and click on System.
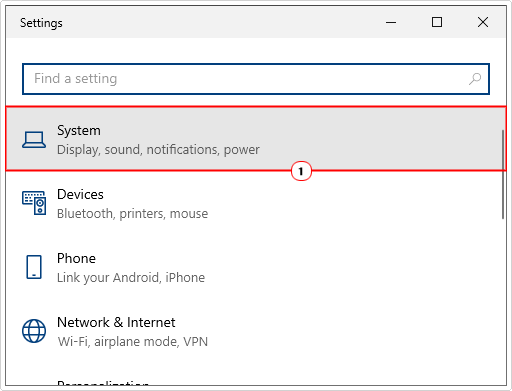
3. This will bring up the System applet, from here, click on Sound.

4. On the Sound page, scroll down, and then click on Sound Control Panel below Related Settings.
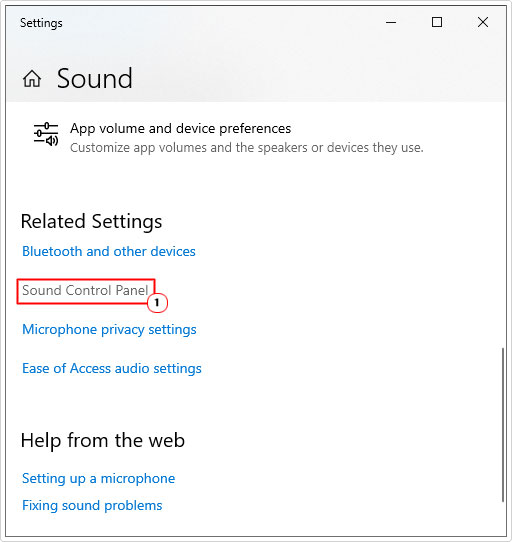
5. This will bring up the Sound applet, next, on the Playback Tab, click on NVIDIA High Definition Audio and click on Set Default and click on OK.

Note: Make sure the NVIDIA High Definition Audio you select has Ready written just beneath it.
Now you can check whether or not it fixed the error.
Update GPU Drivers
Seeing as the NVIDIA High Definition Audio is a feature of your NVIDIA GPU it is important that you have the most up-to-date and working drivers for it. To do that, you will need to visit the website of your GPU manufacturer and download and install the latest drivers off there.
To do that, you will need to know the Model of your device.
Alternatively, if you simply lack the patience or technical proficiency to do it correctly, then you can use a driver automation tool to do it for you.
Simply, download, install and run the tool, and it will scan your system, detect the various devices installed inside it. Then, download and install the latest drivers for all of them.
All within a number of mouse clicks.
If by any chance that interests, you, then visit the link below:
CLICK HERE TO CHECK OUT THE DRIVER FINDER TOOL
 The solution(s) below are for ADVANCED level computer users. If you are a beginner to intermediate computer user, I highly recommend you use the automated tool(s) above! The solution(s) below are for ADVANCED level computer users. If you are a beginner to intermediate computer user, I highly recommend you use the automated tool(s) above! |
Roll Back Drivers
If the NVIDIA High Definition audio no sound issue started to occur right after you installed or updated your drivers, then there’s a good chance that the issue was caused by that install or update.
Microsoft Windows has a feature that allows you to roll back to a previous driver. In this case, the previously working drivers.
To use this feature, simply follow the steps below:
1. First, boot into Windows as a full administrator.
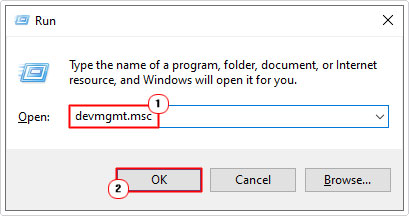
2. Then press + R, type devmgmt.msc and click on OK.
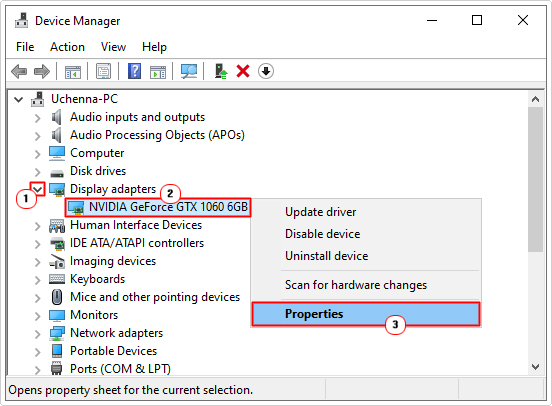
3. When Device Manager loads up, click on the > icon next to Display adapters, then right-click on your NVIDIA GPU and select Properties.
4. This will bring up the NVIDIA Properties page, now click on the Driver Tab, and then click on Roll Back Driver.

Note: If the button is greyed out, it means no backup drivers exist on your system.
5. Lastly, follow the onscreen instructions to successfully set your drivers back to a previous version.
Enable Sound via BIOS
If you have an integrated NVIDIA GPU, then you should be able to enable or disable the sound component of the device within the BIOS. In this particular instance, it’s possible the sound component was disabled or has been disabled (if you’ve never used the feature up to this point)
To enable it, you’ll need to access the BIOS.
Note: For this step, I recommend you consult the manual of your motherboard for instructions on how to do this. It should tell you where to find the appropriate option(s).
That said, the general steps to tackling this issue are as follows:
1. First, you want to access the BIOS. To do that, you will need to restart the system, then press F1, F2, F8, Del etc. at the POST (Power on Self-Test) screen.
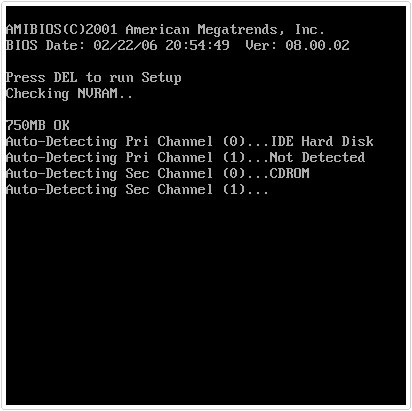
Note: The key you need to press will vary, depending on your motherboard and BIOS version.
2. Once you’ve accessed the BIOS, you will need to select advanced options.
3. Now, select the option(s) related to Integrated or On-board Peripherals.
4. Inside this option you should be able to find the sound options, usually under Audio Controller. Now, select Enable using the provided instructions.

5. Lastly, select Exist & Save Changes. Doing so, should automatically restart the system.
After the system has finished booting up, you can verify whether or not the NVIDIA High Definition Audio is now working.
Are you looking for a way to repair all the errors on your computer?

If the answer is Yes, then I highly recommend you check out our 24/7 Live Support Service.
Which is the leading Online Support Service that is able to help you cure your system from a number of different ailments such as Windows Installer Errors, Runtime Errors, Malicious Software, Spyware, System Freezing, Active Malware, Blue Screen of Death Errors, Rundll Errors, Slow Erratic Computer Performance, ActiveX Errors and much more. Click here to check it out NOW!