
| Attention Before you read this post, I highly recommend you check out my resources page for access to the tools and services I use to not only maintain my system but also fix all my computer errors, by clicking here! |
Whenever you work with any external storage device (HD, USB stick, etc…) there’s a process one must follow if they want to reclaim their device. Quite simply it’s the ejection process, one must select eject within the Windows UI before they can remove the device from their system. However, there are times when this process fails, and the user is greeted with a “can’t eject external hard drive” error message. So what can you do about it? Continue reading to find out.
Given the increasing popularity of external storage devices, such as HDs, USB sticks, Flash drives, now that CDs are all but obsolete, it’s not uncommon for people to report this problem.
In short, the user is unable to safely remove or eject their external storage device. Because the “eject disk” option is unresponsive.
Ultimately, the user could opt to remove the device without ejecting it but that runs the risk of corrupting any data on it. Though, such corruption may be recoverable, with the right data recovery tool, but in most cases, only some, not all, of the data is recoverable.
To ensure proper functionality and 100% data integrity, it’s important that you close any open processes (on the external device) and eject it, before physically removing it.
Why Causes “Can’t Eject External Hard Drive” Errors?
In the vast majority of cases, the “can’t eject external hard drive” error will occur because a process on the external device is currently in use by the operating system.
However, other possible causes are as follows:
- The external storage device has been infected with a malicious file.
- The operating systems USB drivers are outdated or corrupted.
Other things you may want to consider is OS corruption, faulty external device, incompatibility etc…
Now that we have the potential causes out of the way, continue reading to find a series of solutions you can use right now to fix this problem.
How to Fix It
The first thing you’ll want to do, before anything else, is wait a couple of seconds then retry the ejection process.
It’s not uncommon for the external device to enter sleep mode, if it’s been in an idle state for an extended period of time. In such circumstances, you’ll want to give the device some time to wake up, then retry the “eject”.
If the problem continues to persists, then make sure you have closed all files on the external device.
Again, Windows will not allow you to eject an external storage device, if files on it are still in use. This is to protect those files from any corruption. To ensure that any and all files on the device are close, press Alt + Tab and circle through all open apps, and close the app or file where applicable.
Empty Recycle Bin
Another reason why Windows may not allow you to eject the external device is because files currently on it are lying in your recycle bin. If that is the situation in your case, you will need to empty (and erase) the file(s) before you can eject the drive.
Just do the following:
1. Right-click on the Recycle Bin and select Empty Recycle Bin.

Restart Your System
If the “can’t eject external hard drive” continues to rear its ugly head, then you should definitely consider a full system reboot. It’s possible a file or process, that you are unable to locate, is still running, unbeknownst to you. In situations like this, restarting the system will fix the problem.
Simply select Restart from the Start menu.

Update USB Drivers
This was something that was touched on, as a potential main cause of the “can’t eject external hard drive” error. It’s possible the drivers for your USB device are outdated or corrupted.
Typically, these drivers come bundled with your motherboard drivers. So you will need to know the make (manufacturer) and model number of your board, to locate and download the most recent drivers for it.
The drivers should be accessible on the manufacturer’s website.
Alternatively, if you lack this information or if the process seems too complex for you, then you can use a driver automation tool.
The one I have in mind is fully automated, all you have to do is download, install and run it, and it’ll do the rest.
If such a tool is of interest to you, then visit the link below:
CLICK HERE TO CHECK OUT THE DRIVER FINDER TOOL
Use Windows Repair Tool to Fix “Can’t Eject External Hard Drive” Error
If you’re system is generally bogged down with errors, running much slower than usual, with random popups, then you need a Windows repair tool to fix it.
The one I have in mind is multifaceted, able to scan, detect and fix a wide range of issues and errors on your system.
You can expect issues like registry errors, DLL errors, BSOD errors, virus infections and much more to be fixed, with a single scan of this tool.
It’s very easy and safe to use, all you need to do is download and run it, and it’ll do the rest.
If, for any chance, this interests you, then visit the link below:
CLICK HERE TO CHECK OUT THE ADVANCED REPAIR TOOL
 The solution(s) below are for ADVANCED level computer users. If you are a beginner to intermediate computer user, I highly recommend you use the automated tool(s) above! The solution(s) below are for ADVANCED level computer users. If you are a beginner to intermediate computer user, I highly recommend you use the automated tool(s) above! |
Run Windows Hardware & Device Troubleshooter
If the error still occurs, even after attempting the numerous solutions above, then you may want to consider using the built-in Windows Hardware & Device Troubleshooter, to pinpoint and potentially fix the problem.
To access this tool, simply do the following:
1. Ensure you’ve booted into Windows with administrative rights.
2. Then press  + R, type msdt.exe -id DeviceDiagnostic and click on OK.

3. This will bring up the Hardware and Devices applet, click on Next and follow the onscreen instructions.

Once finished, you can now try the ejection process for your external device.
Use Disk Management
If you are unable to eject the external device through the Desktop or File Explorer, you may want to try the Disk Management tool.
To do that, follow the steps below:
1. Make sure you’ve booted into Windows with administrative rights.
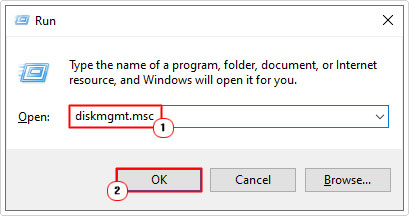
2. Then press + R, type diskmgmt.msc and click on OK.
3. This will bring up the Disk Management tool, from here scroll down and right-click on the External Disk, and then select Eject.

4. You can now safely remove the external storage device from your system.
Use Run Command
Run Command is a built in feature that allows you to open folders, files and apps using short commands. With the right commands, it’s possible to eject an external storage device from your system.
To do that, follow the steps below:
1. Ensure you have administrative rights.
2. Then press + R, type RunDll32.exe shell32.dll,Control_RunDLL hotplug.dll and click on OK.

3. This will bring up the Safely Remove Hardware applet, from here, click on your External Device, then click on Stop.

4. Now you can remove the device from your system.
Use Process Explorer
If the problem persists, even up to this point, then you can try using a third-party utility tool to eject the external storage device.
The tool I have in mind is called Process Explorer, simply follow the steps below to use it:
1. First, download the tool from Microsoft here: https://learn.microsoft.com/en-us/sysinternals/downloads/process-explorer
Note: Click on Download Process Explorer.

2. Now, double-click on it (ProcessExplorer) to open it.

3. Depending on your file compression tool this may look different. Next, click on Extract to.

Note: For this tutorial, I’m using WinRAR.
4. This will bring up the Extraction path and options applet, simply click on OK.

Note: Make sure to make note of the Destination path.
5. Now, open the folder and right-click on procexp and select Run as administrator.

6. When Process Explorer loads up, click on the Find Handle or DLL icon.

7. This will bring up the Process Explorer Search applet, simply type your External Drive Letter into the Handle or DLL substring box and click on Search.

8. Under Process, click on the File.

9. On File Explorer, under Handles, right-click on File and select Close Handle.

10. Now you can safely remove the External Storage Device from your system.
Are you looking for a way to repair all the errors on your computer?

If the answer is Yes, then I highly recommend you check out Advanced System Repair Pro.
Which is the leading registry cleaner program online that is able to cure your system from a number of different ailments such as Windows Installer Errors, Runtime Errors, Malicious Software, Spyware, System Freezing, Active Malware, Blue Screen of Death Errors, Rundll Errors, Slow Erratic Computer Performance, ActiveX Errors and much more. Click here to check it out NOW!