
| Attention Before you read this post, I highly recommend you check out my resources page for access to the tools and services I use to not only maintain my system but also fix all my computer errors, by clicking here! |
A memory dump file is created every time your computer system crashes. This dump file contains a series of information that would, theoretically help you understand the cause of the crash. For this reason, said dump files can be important when troubleshooting system crashes. The dump file creation failed error, indicates a failure to create the dump file. Users may find the exact error notification within Event Viewer. If you find yourself in this same situation, then perhaps the information provided in this tutorial will help you.
It is possible to diagnose an issue with your system without the dump file. The data recorded in Event Viewer is typically enough to pinpoint the exact cause of the issue – a dump file will usually provide an even more accurate report of the error.
Dump files carry the .DMP file extension, and are stored, by the Windows operating system in a minidump folder. This folder can typically be found in the following location:
C:\Windows\Minidump
Information contained on these dump files include time of the system crash, along with all the processes that were running at the time of the event.
The data within the dump file can at times be somewhat different to interpret. Making it only useful to very experienced computer users or specialised system administrators.
When the dump file creation failed error notification pops up, it can be rather difficult to determine the exact cause. This is because there are an assortment of possible culprits. To follow, I will break down its most commonly known causes, along with solutions you can deploy right now.
What Causes Dump File Creation Failed Errors?
So, what exactly cases this error? Below you will find a number causes that most frequently pop up when looking at this error:
- Corrupted Windows files: The corruption of integral system files is known to cause this error. It is possible one or more system files were inadvertently erased or corrupted.
- BIOS Issue: Your BIOS, in most circumstances will be largely stable. However, there are instances when an outdated or unstable BIOS can cause dump file creation issues. Errors caused by the BIOS can be difficult to troubleshoot, which is why it’s best you ensure it’s also kept up-to-date.
- Faulty Hardware: It is possible one or more hardware components is causing the dump file creation error. This can range from a faulty hard drive to corrupted memory (RAM) modules.
- Maintenance suite: Do you have a third-party maintenance app (like Ccleaner) installed on your system? If so, it could be inadvertently erasing your dump files (from the minidump folder). This could be what’s causing the error.
Now that we have a general idea of the things that can cause a dump file creation failed error, let’s get to the assortment of solutions you can deploy right now.
How to Fix It
In this section I will go through a number of methods, all of which proven successful at fixing this problem. However, as always, I like to start small, so, the first thing you should do, is uninstall your maintenance app.
If you have Ccleaner, for example, installed on your system, consider uninstalling it (at least temporarily), then observing, to see whether or not it fixed the problem.
Removing an app is fairly simple, just do the following:
1. Boot into your system as a full administrator.
2. Then press  + R, type Appwiz.cpl and click on OK.
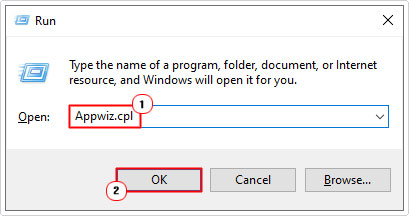
3. When Add or Remove Programs loads up, locate, then click on Ccleaner and click on Uninstall.

4. Follow the onscreen instructions to remove the app, then check, to see whether or not it fixed the error.
Run Windows Repair Tool to Fix Dump File Creation Failed Errors
Another method you can deploy right away to fix the dump file creation error, is to use a Windows repair tool. The tool I have in mind is called Advanced System Repair Pro and it is a powerful and advanced tool, capable of fixing a wide range of problems on your system.
Within a single scan, you can expect it to detect and fix hardware issues, malicious infections, data corruption, runtime errors, BSOD errors and much more.
This tool is also capable of making your system faster, making it an all-round repair and maintenance tool.
If this interests you in any way, then I suggest you visit the link below:
CLICK HERE TO CHECK OUT ADVANCED SYSTEM REPAIR PRO
 The solution(s) below are for ADVANCED level computer users. If you are a beginner to intermediate computer user, I highly recommend you use the automated tool(s) above! The solution(s) below are for ADVANCED level computer users. If you are a beginner to intermediate computer user, I highly recommend you use the automated tool(s) above! |
Disable Automatic Restart
Sometimes when the operating system is set to restart automatically after a significant (BSOD) crash, it can prevent the OS from creating the dump file. So, as a viable solution, you could consider turning this feature off.
To do that, follow the steps below:
1. Boot into your system as an admin.
2. Next, press + R, type SystemPropertiesAdvanced and click on OK.

3. This will bring up the System Properties applet, (which should default to the Advanced Tab), click on Settings under Start-up and Recovery.

4. The Start-up and Recovery window should appear. Un-tick the box for automatically restart, then click on OK.

Run SFC and DISM
As previously noted, it’s possible for dump file creation failed errors to occur as the result of OS corruption. In instances like this, end users have been able to fix the problem by restoring the integrity of their operating system. To do that, you have the option of using both DISM and SFC, both designed to fix system file corruption.
The differences lay in its methodology, DISM uses Windows Update to acquire healthy copies of missing or corrupted OS files. While SFC uses stored archive data to do the same thing. To improve your chances of fixing the data corruption, it is recommended that you run them both.
You can find instructions on how to use these tools from my post on fixing D3dx9_43.dll is missing errors.
Scan Hard Drive
When a system suffers from hardware failure, the hard disc drive is a more common culprit than components such as your RAM. This is especially true for older mechanical hard drives, as they are more prone to malfunction, which can (in some instances) prevent the OS from creating dump files.
Fortunately, there is a feature called S.M.A.R.T which is present on a wide range of hard drives. That can be used to check the status and health of the drive. To get this status information, please do the following:
1. Boot into your computer as a full administrator.
2. Now press + R, type cmd and press CTRL + Shift + Enter.
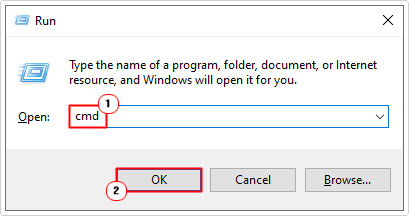
3. When Command Prompt successfully loads up, type the following command below and press Enter.
wmic diskdrive get model,status
Note: A status of OK indicates the drive is healthy, while Pred Fail, means the drive is about to fail.
If you want a complete analysis of the overall health of your system, there are third-party tools that you should use. One in particular that I recommended is called CrystalDisk Info, it is free to use. So I suggest you give it a look in.
Update BIOS
If the dump file creation failed error continues to persist, even after attempting all prior solutions, then you may want to look at the BIOS. Updating the BIOS may be in order. Fortunately, it isn’t nearly as difficult as it was in the past.
That said, there are a lot of risks associated with this process. For example, if the system losses power during the update process, it will totally brick your system. So, you need to ensure there won’t be any hiccups, sudden power outages or crashes when doing this.
The exact instructions on how to update the BIOS will vary, depending on its brand and version. I recommend you visit the website of your motherboard manufacturer for more information. They should be able to walk you through the process via a video.
Alter Debug Settings
There are a series of actions and behaviours that the OS will carry out, in the event of a crash. Fortunately, all these actions can be configured. There are instances when a system may be configured to not create a dump file, which in turn triggers the dump file creating failed error. All-in-all, you can ensure this isn’t the case, by doing the following:
1. First, follow steps 1 – 3 of Disable Automatic Restart.
2. From the Start-up and Recovery applet, set Write debugging information to complete memory dump. Then click on OK.

3. Finally, restart your system, then verify whether or not this has fixed the problem.
Reinstall Windows
If the dump file creation failed error is still there, then you may want to try something a little more drastic. Such as a reinstallation (or repair installation) of your operating system.
In many instances, this process will restore the integrity of your operating system.
You can find the necessary instructions on how to do this, from my post on fixing Windows Update error 0x800703f1.
Are you looking for a way to repair all the errors on your computer?

If the answer is Yes, then I highly recommend you check out Advanced System Repair Pro.
Which is the leading registry cleaner program online that is able to cure your system from a number of different ailments such as Windows Installer Errors, Runtime Errors, Malicious Software, Spyware, System Freezing, Active Malware, Blue Screen of Death Errors, Rundll Errors, Slow Erratic Computer Performance, ActiveX Errors and much more. Click here to check it out NOW!